So, you have decided to explore the crazy world of Android. Well, that’s one of the best decisions of yours because there are now more than 2.5 billion activeAndroid devices in the world and you will be developing applications for an audience this big.
To develop Android Applications there and many other IDE’s like Eclipse, IntelliJ IDEA, Microsoft Visual Studio, etc. But the best of all is Android Studio which is a Google product, the company that made android. In this article, we will learn how to install Android Studio IDE on Windows, Mac, and Linux devices.
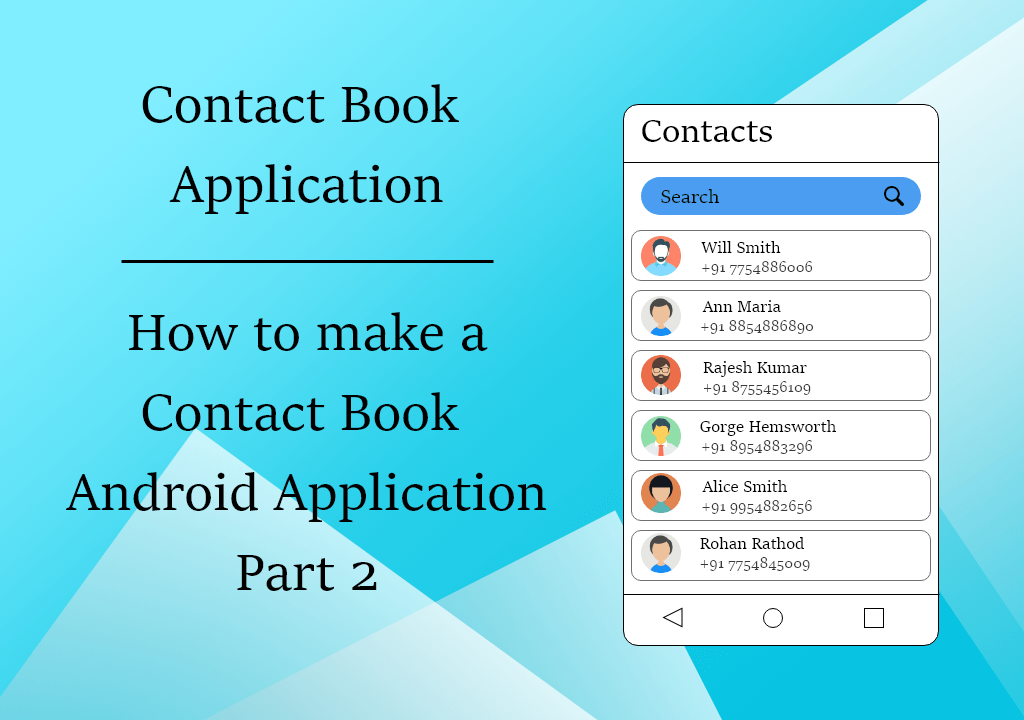
In the upcoming articles, I will be teaching you to develop fully functional android applications that can be instantly published. So don’t forget to subscribe to our newsletter to get all the latest post first.
Getting Started with Android Studio:
Android Studio is the official IDE (Integrated Development Environment) specifically built, on JetBrains’ IntelliJ IDEA, for Android Development. Earlier Eclipse was widely used for developing apps for Android Operating System. Android Studio has turned out to be the best replacement for it, as it takes care of all the needs of a developer and makes the tricky part of coding apps easier.
Launched on May 16, 2013, at the Google I/O conference, Android Studio is currently at version 3.5 and is available for platforms like Windows, Mac OS, Unix/Linux.
System Requirements:
Windows requirements
Microsoft Windows 7/8/10 (32-bit or 64-bit)
3 GB RAM minimum, 8 GB RAM recommended (plus 1 GB for the Android Emulator)
2 GB of available disk space minimum, 4 GB recommended (500 MB for IDE plus 1.5 GB for Android SDK and emulator system image)
1280 x 800 minimum screen resolution
Mac OS requirements
Mac OS X 10.10 (Yosemite) or higher, up to 10.13 (High Sierra)
3 GB RAM minimum, 8 GB RAM recommended (plus 1 GB for the Android Emulator)
2 GB of available disk space minimum, 4 GB recommended (500 MB for IDE plus 1.5 GB for Android SDK and emulator system image)
1280 x 800 minimum screen resolution
Linux OS requirements
GNOME or KDE desktop. Tested on Ubuntu 14.04 LTS, Trusty Tahr (64-bit distribution capable of running 32-bit applications)
64-bit distribution capable of running 32-bit applications
GNU C Library (Glibc) 2.19 or later
3 GB RAM minimum, 8 GB RAM recommended (plus 1 GB for the Android Emulator)
2 GB of available disk space minimum, 4 GB recommended (500 MB for IDE plus 1.5 GB for Android SDK and emulator system image)
1280 x 800 minimum screen resolution
Once you’ve ensured that your operating system is compatible with Android Studio 3.2.1 or higher, download the appropriate Android Studio distribution file. The Android Studio download page auto-detected that I’m running a 64-bit Windows operating system and selected android-studio-ide-181.5056338-windows. (927 MB) for me to download.
Installing Android Studio:
To install Android Studio on Windows, proceed as follows:
If you have downloaded a .zip file, unpack the ZIP, copy the android-studio folder into your Program Files folder, and then open the android-studio > bin folder and launch studio64.exe (for 64-bit machines) or studio.exe (for 32-bit machines).
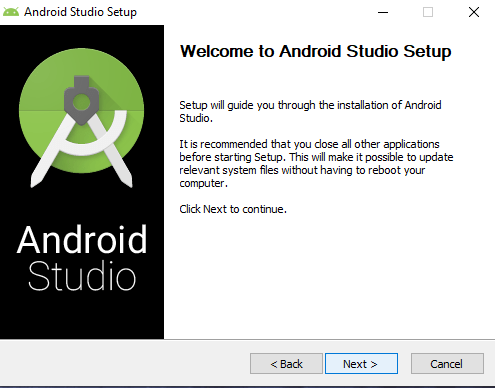
The following dialog box will appear:
step 3:
Click Next>. It will take you to the following panel where you can select to install Android Virtual Device (AVD) along with Android Studio. Do not uncheck the AVD checkbox. Click on Next>.
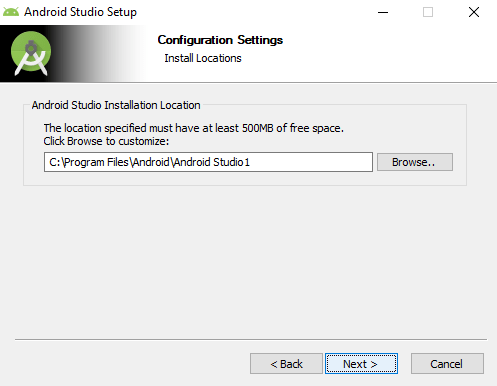
step 4:
In the next panel, it will ask you to select your desired location where you wish to install the Android Studio Application. By default, it will be installed in C:/Program Files/Android/Android Studio
Select a location which at least has 3Gb of space.
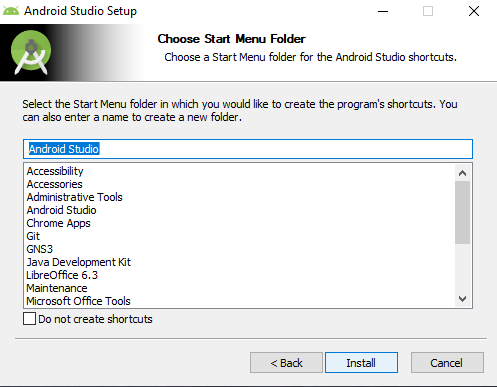
Step 5:
Next, the installer asks to select a folder name where the program’s shortcut will be created. Click on Install.
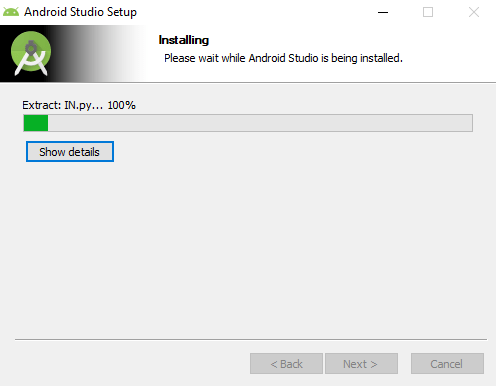
step 6:
All good things take time, so will this. Be patient until the installation completes and do not forget to connect to the internet as the installation is in progress. It might take around 5 to 10 minutes
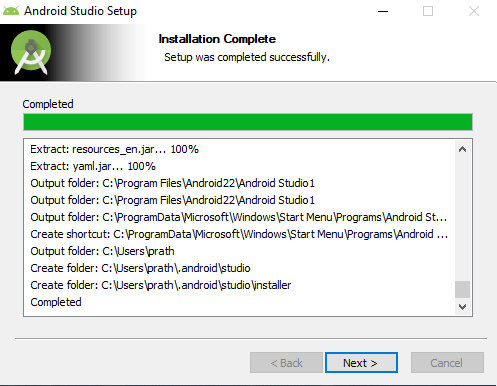
step 7:
There you go! The installation is completed successfully.
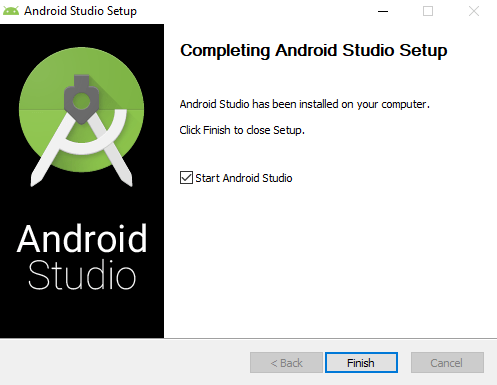
step 8:
Now, click on Next> and then click Finish to start Android Studio.
step 9:
There you go! Your Android Studio is installed and ready to use.
There are a few more things to be set up to start using the IDE. Like installing the Android SDKs and setting up the Android Virtual Device. Let’s take a look at it:
Running Android Studio:
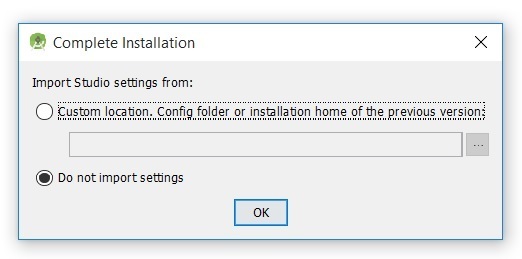
When you start Android Studio for the first time, it opens a Complete Installation dialogue box which offers you an option to import settings from a previously installed version, if any.
If you are installing Android Studio for the first time, click on the Do not import settings radio button and click OK.
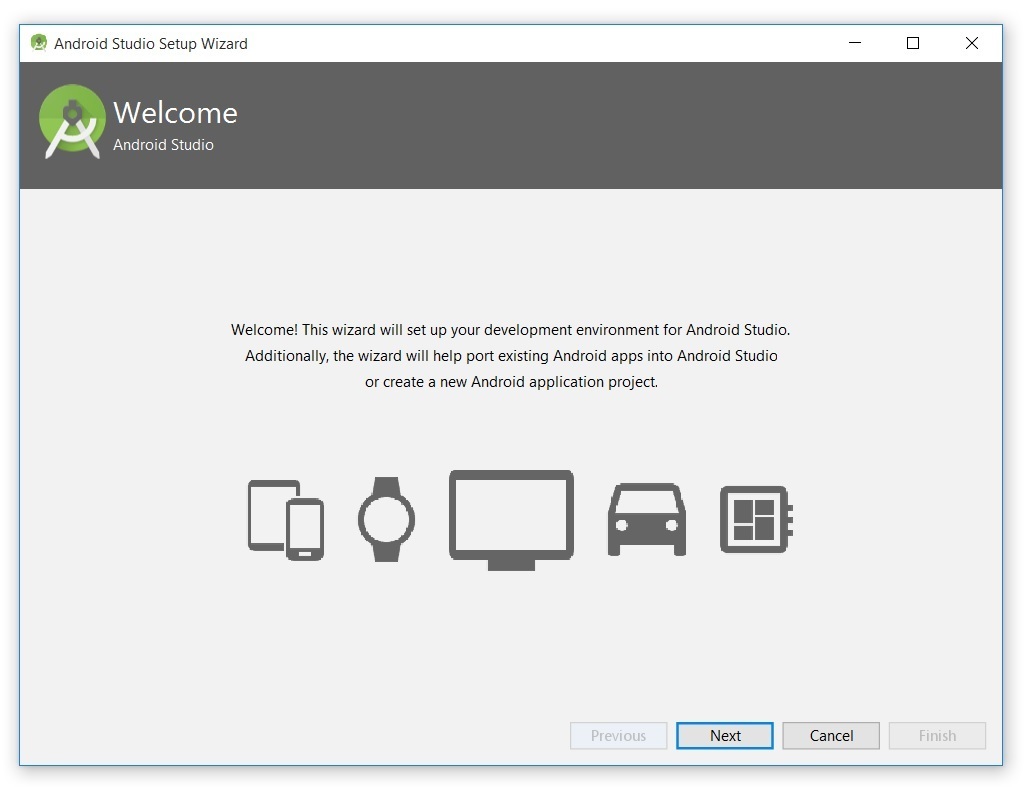
After this, a splash screen appears, which looks something like this :
At this point, Android Studio presented the following Android Studio Setup Wizard dialog box:
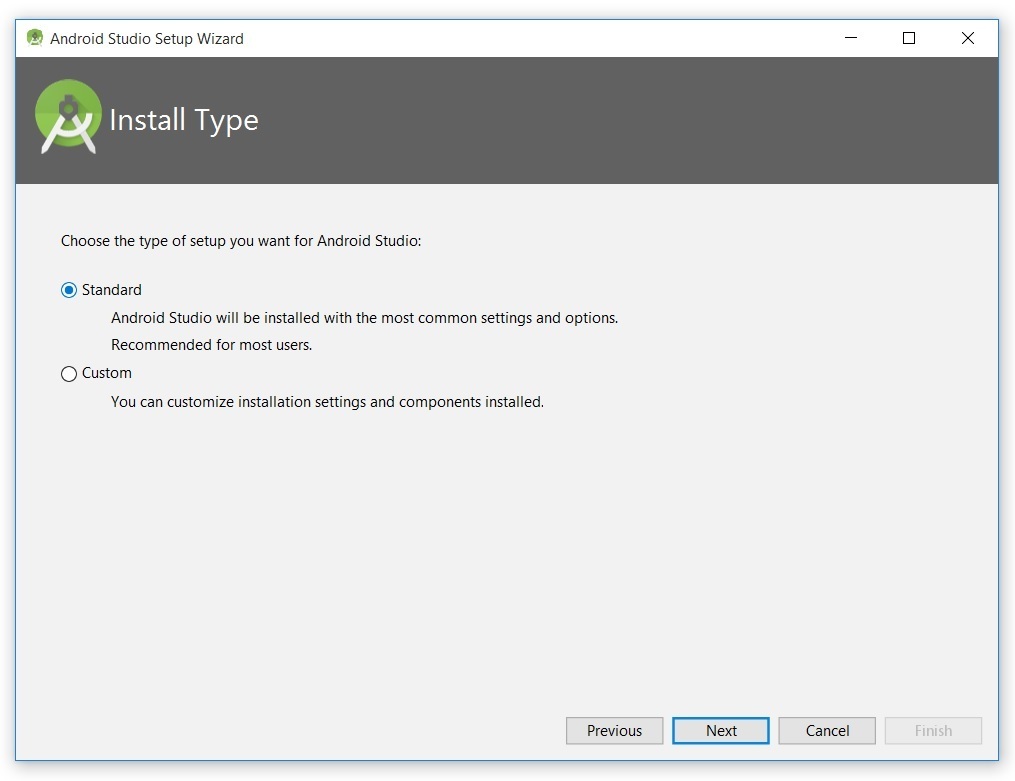
On clicking Next, the wizard will ask to select ane installation type. Select Default and click Next.
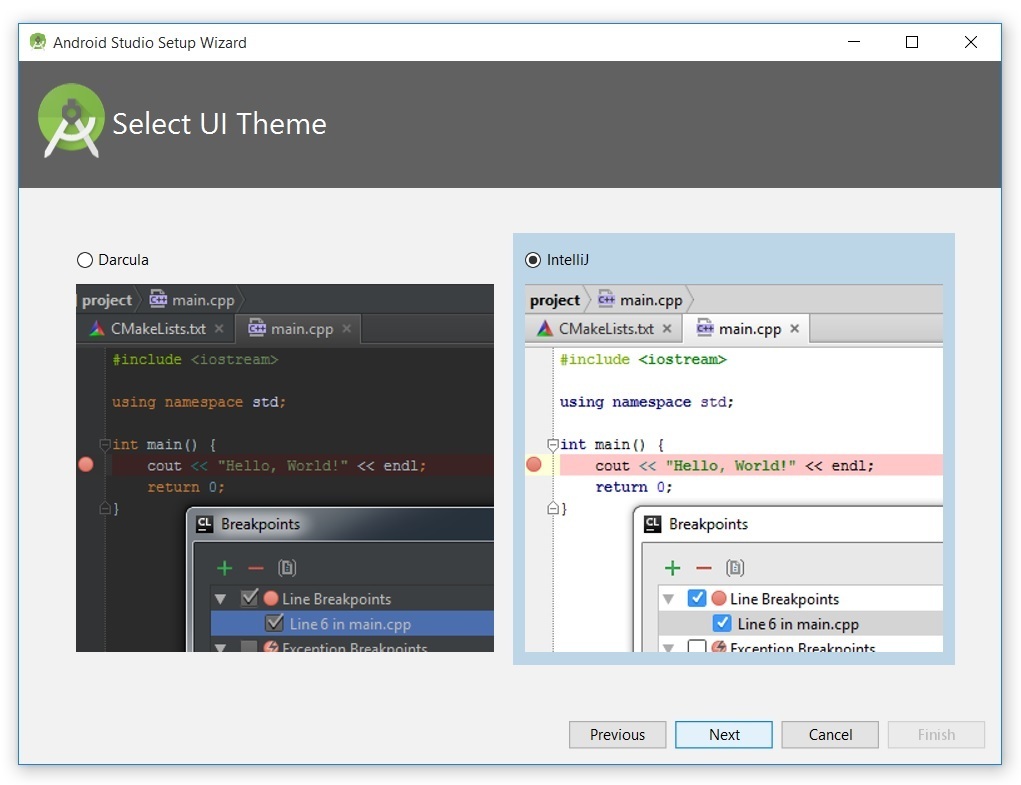
The wizard then gives you a choice to select the UI theme of the IDE. A personal recommendation – select the Dracula Theme. It looks and feels cooler than the Intellij Theme.
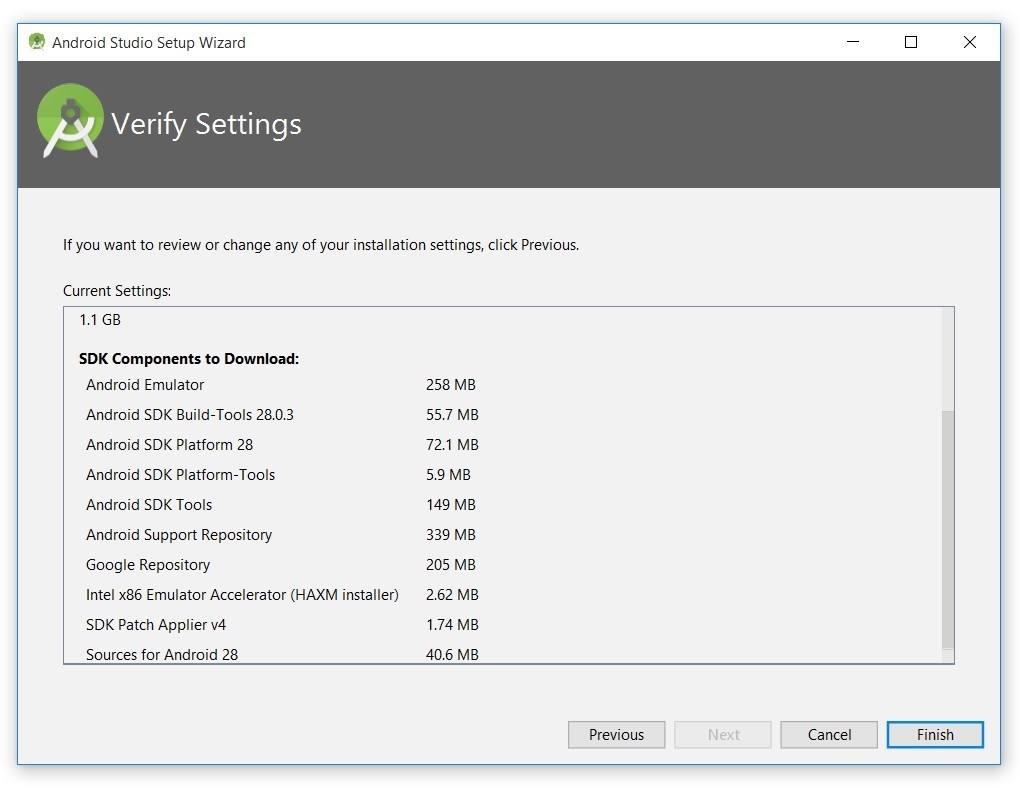
Click Next once done. The Wizard next provides an opportunity to verify all the settings that are going to be applied.
Click on Finish. Android Studio will then start install SDK Components
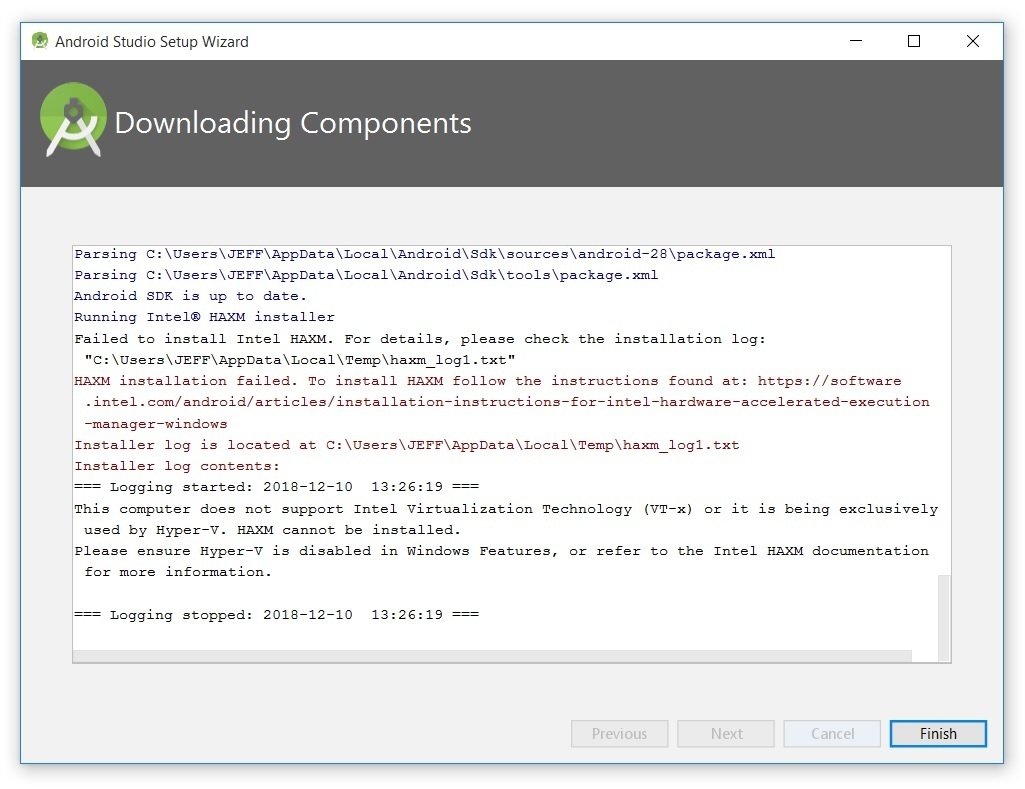
It can take several minutes for this part of the setup to finish. Clicking Show Details might relieve some boredom by revealing the various files being downloaded and unzipped.
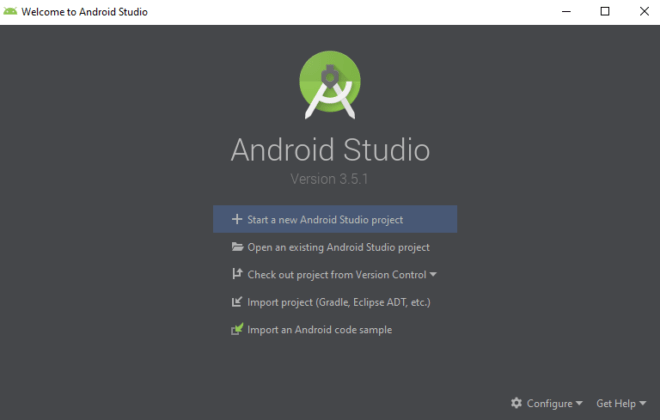
Once it’s completed, click on Finish to complete the wizard. The Welcome to Android Studio dialog box appears.
This dialog box is used to start up a new Android Studio project, work with an existing project, and more. It can be accessed by selecting Android Studio from the Windows Start menu, or the equivalent on another platform.
And that’s it! We have successfully installed and set up Android Studio. That’s all you need to get started with Android Development. Let’s learn how to create a new project in the next post.


